Saturday, September 20, 2014

Is this simple mistake making a mess of your kitchen?

Is this simple mistake making a mess of your kitchen?  It sure was making a mess of mine!  Since the school year started, I have felt that the kitchen was always a mess, even though I was constantly cleaning it.


Disclaimer: If you do not have a dishwasher, take my sincere sympathy and respect, and click away now.

What was the mistake that was wreaking havoc in my kitchen?  I was running the dishwasher at the wrong time of day!  I had been religiously running the dishwasher after dinner, and at one time, I think that worked well.  However, emptying the dishwasher has become an after school chore.  

Realizing that I had dirty dishes in the counter and clean dishes in the machine, I decided to try the daily dishwasher run in conjunction with lunch clean up.  Voila!  A clean kitchen! All day I just put in dirty dishes, and after school the kids help me put away the clean ones.

Here's my formula for when to run the dishwasher: A) If it is full, run it.  B) If it is time,run it.  Figure time to run the dishwasher by deciding when the best time to put away dishes is.  Back track to the last meal before that.  Clean up from that meal is time to run the dishwasher, full or not.  

We are sneaking in some extra cycles now, and that's ok.  Modern dishwashers are extremely efficient.  My time in money more than pays for the extra bit of electric.  

Granted, I still put on some hours in the kitchen, but at least it looks like it now!  If you have another trick for keeping a busy kitchen clean, I would be grateful to hear it.


Tuesday, September 2, 2014

Seasons are Changing:Goals September 2014

Hi Friends,

If you are reading this post, it is probably because you are A) someone who regularly takes a personal interest in me.  B) someone who I have connected with as a blogger.  Either way, I consider you a friend.

A little more than four years ago my husband and I started a crazy project of rearranging our lifestyle.  This fall marks the first time since then that I would call our life normal.   Life is always uncertain, but as of three weeks ago we have the pieces to live the life we consider to be our dream.  

If my agnostic friends will bear with me a moment, I do believe that God has taken some very ugly things out of our life, protected us at vulnerable times and kept us fed, clothes and housed.

This blog has been a distraction from stress, and means for personal growth, and a way to connect with new people.  This summer I realized that I no longer "need" to blog, but I really like it.  I decided to try to become a little more serious...and ended up starting a new blog two weeks ago.  

Blogging Changes


ThrivingSTEM.com is devoted to the process of learning science and math.  I plan to write curriculum to sell and hopefully do some paid reviews as well.  I am extremely excited about this new project!   

In the mean time, this blog (WisdomKnowledgeJoy) is going to become a true Mommy blog that serves as a catch-all for thoughts that don't fit on Thriving STEM.  It will probably be sporadic and not read much, and that is fine.


One more fun new adventure though! I am extremely pleased to be joining Dollie Freeman's team at Teachers of Good Things.  Teachers of Good Things is a great resource for moms who want to teach their children good things in a beautiful way.  My first monthly post, How to Enjoy Walking with your Pre-schooler goes live tomorrow. It's a topic that is near to my heart, and I am so excited to be sharing on a larger blog!

August Goals

Blog:  I want to transition to  a .com and finish organizing my posts by topic so they can easily be found through pages. I have set a goal  of doing a Science Along the Way Post every week, and plan to do at least three other posts this month, including one on another blog. ThrivingSTEM.com is up and running, and my Ordinary Observations series is going strong. 

Curriculum:  I want to write one long math unit to sell on Teacher Pay Teacher, update the science unit I have already done, and do one short science lesson to offer for free.   I have all the pieces to the unit, I just need to sit and do some lay out work, not my favorite, but it will be worth it. 

Family:  Establish some good routines to support my older children's success during the school year. I think we're on track!

Home:  Finish putting up the decor we have on hand and sort through the last of the boxes.    I did the decor but the boxes are still sitting in the gargage.  Oops!

September Goals
Blog:  I am hoping to reach 1,000 views in the first month of ThrivingSTEM.  That's dependent on other sharing, so we'll see.  

Curriculum:  I need to do some lessons for a couple of real live students!  Once that's done, I would like to get my TPT store in shape.

Family:  I want to work on putting together some exploratory activities that my six-month-old will enjoy.  Also, my four-year-old could use some enrichment to supplement her pre-school experience.

Home:  Do my part in the garage.  My husband has been doing a great job, and my disorganization has been the undoing of the garage, including those boxes.  I hope to get it caught up this month!

Several great  bloggers are sharing their goals at MamaSmiles this month if you would like to take a peak.

Thanks for Reading!

Tuesday, August 5, 2014

Cartoon Book and Paper and Magazine Recycle!Create!

T-Rex loves to read cartoons. Every Sunday, he eagerly retrieves the Sunday paper, eager to read the new comics.   Sometimes, he can even read them all by himself.  While I have nothing against cartoons as a medium, some of the humor is not appropriate for my five-year-old.

I decided to use the comics from the Sunday paper to make him a custom comic book.   All I needed was the Sunday paper and a cheap composition book.


I cut the cartoons apart and glued them into the book.


T-Rex enjoys being able to read the cartoons over and over.  I feel better about the content he is reading, and as a bonus, the book is much easier to keep in order than all those big floppy papers.

This month's challenge from Recycle!Create!  is to make something for or with your children using paper, newspaper, or magazines.  Learn more about the Recycle!Create! project .


Check out the projects from the other co-hosts.

And, if you have a project of your own, be sure to link it up!

Saturday, August 2, 2014

Goals: August 2014


Every month a group of great bloggers share their goals at Mama Smiles.  Being part of the blogging community is one of the best parts of blogging.   So this month, I am joining in.  

January-July


We moved (just a few miles) in January, welcomed a new baby in February, and finished our home school year in May, ready to enroll T-Rex in public school. As you can imagine,  life has been a blurr.  But, I think we covered the needed academics and kept everyone relatively well fed and clean.

During all that craziness, I blogged as a way to relax and refocus.  This summer as things slowed down, I realized that I have probably maxed out what I can do with my free blog. I also realized that I really like blogging.  So, I am going to jump in and try to move my blogging up to a paid hobby.  Here I am --setting some goals.

August goals


Blog:  I want to transition to  a .com and finish organizing my posts by topic so they can easily be found through pages. I have set a goal  of doing a Science Along the Way Post every week, and plan to do at least three other posts this month, including one on another blog.

Curriculum:  I want to write one long math unit to sell on Teacher Pay Teacher, update the science unit I have already done, and do one short science lesson to offer for free.  

Family:  Establish some good routines to support my older children's success during the school year.

Home:  Finish putting up the decor we have on hand and sort through the last of the boxes.

Friday, August 1, 2014

Shadows: How a baby can learn science along the way


Little Diddle (5 months) went with me to take some excess garden produce to the neighbor.  On the way home, she noticed something interesting.  She leaned forward and made little cooing sounds to alert me to her discovery.

Can you believe it?!  The sun's rays were bouncing off the road.  However, none of the rays could travel straight through our bodies.  Only the rays that refracted (bent) around our bodies could make it to the piece of road we blocked from the sun. The result was a dark spot shaped like us that traveled just in front of us.  


I love that idea.  One way to do facilitate that learning is by simple time outdoors. By celebrating these simple discoveries with our kids, we encourage their science learning.  

What has a little one next to you seen recently?


The purpose of this  Science Along the Way series is to remind me, my children, and my readers to celebrate the wonder of the natural world around us.  Scientific statements on this blog are made with the intention accuracy.  If you see an error, kindly leave a correction in the comments.

The post, Shadows: How a Baby Can Learn Science first appeared on WisdomKnowledgeJoy@blogspot.com.

Saturday, July 26, 2014

The Other Way to Make Balloons Float


"Hey Mom, Look!"  Have I mentioned that is my favorite phrase?  Well, at least when it means "Look what I noticed," not "Watch me break my leg."

These balloons were filled with plain old air, not helium.  However, they were floating up, and then falling down again in a kind of circular pattern.  It was really quite mesmerizing.  When I asked my children why this was happening, they quickly identified that the air particles from the vent were hitting the balloon and making it move.  This is great, because understanding that air is made of molecules that can have this impact is one way to prove that gas can have mass, and therefore really is matter.  Most people today readily believe this, but it is not actually all that intuitive, and has been highly debated in other times.

T-Rex was able to give me a clear explanation of the major forces.  Gravity pulls the balloons down, the air molecules push them up.  When the force of the air molecules is greater than gravity, the balloon moves up.  When the force of the air molecules is smaller than the force of gravity, the balloons move down.

In terms of energy, there is a transfer of kinetic (moving) energy from the air molecules to the balloon. As the balloon moves up it trades its kinetic energy for potential energy due to gravity.  When it falls toward earth again it trades the potential energy for kinetic energy once again.  

Next time you notice a moving object, stop and ask.  Why is it moving? It can be a pretty interesting question.


The purpose of this Science Along the Way series is to help me, my children, and my readers stop and notice the amazing physical world in which we live every day.  Thanks for reading!


This post "The Other Way to Make Balloons Float, by Christy McGuire, first appeared on WisdomKnowledgeJoy.


Wednesday, July 23, 2014

At Home Pre-School Boot Camp: Week 4

Welcome to Week 4 of At Home Pre-school Boot Camp!  If you missed the beginning of the series, you may want to start from Week 1.  

You' will notice that these posts are not being published on an exact regular schedule.  As I  am publishing these posts, I am enjoying the last days of freedom before putting my kids in formal education.  These posts are bringing back happy memories as we enjoy the end of summer.  I hope that they will be material for some other mom making her own memories.

Things to do just once this week

If you have been following this series from the beginning, your child has been attending a structured activity that is going to help him have success in society for a few weeks.  This week, add in a social event.  This could mean hanging out at the library after reading time to play.  It could at happen while he is at day care.  It could be a planned trip to the play ground, or an old fashioned play date.


On one of your at home days, block out some time to cook together.  Cooking can provide an opportunity to read a recipe, calculate the needed ingredients, observe science in action, experience a piece of a new culture.  It is a great life skill.   As you are getting started concentrate on letting your child do the work, and making it fun.  Do simple, familiar recipes and allow quadruple the time you would normally need.

If you have more time, ask your child to choose an art activity that you have done before.

Daily habits


First of all, keep up the reading and play times you have already established!  If you are not connecting with your child in a meaningful way, all your other attempts at teaching him will fall flat.  

Start looking for areas where you could allow your child to be more self sufficient.  Could she dress herself, find her own toys, or even fix her own lunch?


Enriching your home environment


Look for some ways that you could make your home more kid friendly.   Think about adding stools and moving the items they use daily to their level.  Here are some ideas to get you started.

Looking ahead


Our next big activity is Play-Doh .  Feel free to just pick some up from the store, or have some baking soda and cornstarch on hand.  Grab a box for the play dough and feel free to toss in some plastic knives, cookie cutters, and anything else that would be fun to use with play dough.


Friend to Follow


Aubrey  from Montessori Mischief has inspired me to give my children freedom in their learning and independence in their daily lives.  Montessori is a great educational philosophy, and I love how Aubrey applies it to the home environment. She also makes herself available for questions!

If you have a question about Montessori education, submit it to her tutorials page. Also, be sure to Check out her Montessori 101 Series! 


This post contains Amazon affiliate links.  Click here for more information.   Thanks for your support!  The post, At Home Pre-School Boot Camp: Week 4 , by Christy McGuire originally appeared on WisdomKnowledgeJoy@blogspot.com.

Five Hacks for Promoting Your Child's Independence at Home

Children naturally want to grow up and do it themselves.  Here are five ways we encourage our children's independence in our home.  You will notice that I didn't pretty up for these photos.  This is how we live, and what independence really looks like at our home.


Kids Book Shelf.


We purchased these book shelves because the cubed sections make a smaller, more manageable space that children can use to put away books correctly.  I added a basket on top just for books that they can read themselves. By the way, the easy to read series that you see above are Phonics by the Book from This Reading Mama (Free!), Now I'm Reading! Level One Animal Pals (Affiliate) , and  Bob Books, Set 1: Beginning Readers (Affiliate).


Kids Learning Shelf


We organized a few toys and several learning activities in containers on the shelf.  The children can remove these, play with them and return them independently.


Kids dish cupboard


The Kids Dish cupboard is one of the low cabinets. My children are responsible for putting away their own dishes from the dishwasher, and setting their own places at the table.  My daughter is usually more particular about stacking the dishes, but I think that allowing some messiness is part of the learning process.


Kids height hangers


My husband moved the hanging bars down, so that the children get to their own clothes and hang them up again when they are finished.  As a bonus, we have extra storage above.


Stools


Changing out a sink is not a quick easy project.  By adding a stool, we bring the children up to the level where they can use the sink efficiently.

Much of what you see here has been inspired by Aubrey at Montessori Mischief.  Check out her Video on organizing Winter Clothes.

Click here to return to the At Home Pre-school Boot Camp Week 4 summary.


This post contains Amazon affiliate links.  Click here for more information.   Thanks for your support!  The post, Five Ideas Promoting Your Child's Independence at Home, by Christy McGuire originally appeared on WisdomKnowledgeJoy@blogspot.com.

Four Secrets for planning Successful Playdates


"Let's get together!"  As a new mom in the area, I am always excited when another mom says those words, and even more excited when it happens.  Play dates are great opportunities for my children to learn social skills.  More importantly, play dates have allowed my children and I to form permanent friendships all over the country and the world.   Here are some play date secrets I have learned from moms around the country and around the world.


Communicate Clearly


We all approach the world with our own bias.  That is why it is critical to communicate clearly with the other mom(s) involved before and during the play date.  Be clear about when and where the play date is taking place, whether or not food will be involved, and what kind of play is expected.  Once the children are together, do not hesitate to ask the other mom if she is comfortable with the type of play that is going on.  If you are the parent who has a concern, speak up.  Be kind, and tell the other parent specifically what you would like to see change.


Make it about the kids


As an extrovert, I can get desperate for adult conversation.  However, if the play date is going to be a success, the other mom and I need to be thinking about the kids, and that may mean that we cannot enjoy as much as conversation as we would like. We may have to make it up on the phone or via text later.

Making the play date about the kids can also means keeping them in sight.   All kids will do things when they think the adults are not looking that they would never try in front of you. You can not help your child develop social skills if you do not know what happened.  

The great thing about making it about the kids is that you can ditch some of the adult conventions.  When we were living in a small town in the southwest play dates we lived pretty far away from our friends, and play dates that did not include a meal were almost impossible.  My friend graciously pulled out the night before's left overs, and it worked perfectly.


Know your limits


Whenever we host a play date, the bedrooms are off limits.  Before our guests come, I instruct my children to move all toys that they wish to share to the living area, and all toys they do not wish to share to their bedrooms.  Keeping guests out of the bedrooms helps keep the kids in sight.  If one of my children needs down time before our guests leave, they have a safe place to go.  Sorting the toys ahead of time helps my children focus on sharing, and be secure that their most special things are safe.

Playing with other children can be surprisingly exhausting.  If your kids are showing signs of being done before the end of the play date, do not be afraid to say, "I think we need to get home for some early naps."  Sometimes this means leaving toys on the floor.  While it is generally good manners to help clean up your mess, it is sometimes in every one's best interest to just get the extra kids out of the situation.  


Go the Extra mile 


Sometimes you can not follow all the best advice.  I just said that it is important to leave when the kids are done.  However, I was in a situation a few years ago where the taxi would not show up, and I was stuck at a friend's house after her kids and mine were well over each other.  My friend graciously made us comfortable, and made it clear that we were welcome time and time again.  

 One of my friends has some children who literally need to snack all the time.  I would be overwhelmed if I had to "be a good hostess" and keep up with their demands for food and drink for the hours they spend at my house. Her children show up with lunchboxes, and we always have a great time together.  These friends willingness to go the extra mile made our play dates a success, because they made the play date happen.  Play dates that happen and that you all want to repeat are always a success.

Have you found some secrets that make play dates successful?  I would love to read them!


Click here to return to the At Home Pre-school Boot Camp Week 4 summary.

If you found this post helpful, you might also like:


 How Parents of Pre-schoolers get the most from their Free Public Libraries


How to Plan a Road trip your Kids will Love: Tip 1


This post contains Amazon affiliate links.  Click here for more information.   Thanks for your support!  The post, Four Secrets for planning Successful Playdates, by Christy McGuire originally appeared on WisdomKnowledgeJoy@blogspot.com.

Friday, July 18, 2014

Pivot Points and Spinning Spoons


Children are hard wired to do science.  T-Rex (5) and Pony Artist (4) demonstrated this the other day at breakfast.   I do not know who started it, but they took turns spinning this spoon.


They discovered that the spoon spins best when just one point touches the table.

  They tried placing the spoon with both ends touching the table. It did not spin well, and tended to flip over.  

It was a perfect experiment with just one variable: which way the spoon was facing. I pointed out to them what they had done, but they were more excited about the spinning spoon itself.


You see, they had just figured out an important physical principle.  Solid objects naturaly spin around a single point.  They might not put it into words just yet, but they definitely learned it. 


What have you and yours learned from play this week?

Monday, July 14, 2014

Get Started with the Alphabet!


This post is part of my at Home Pre-School Boot Camp.  For more information about the series, click here.

Assuming that you are working with the English alphabet, there are fifty-two characters that your child needs to know.  Twenty-six letters with upper and lower cases.  There really is no need to know exactly which ones she does and does not know, unless she knows them all.  The goal of this assessment is just to find three or so to target.  Once she has mastered those, look for a few more.

Quick side note.  Some of my friends who use the British system teach sounds ahead of letter names.  I did not choose this route, but if you want to use it,  just substitute the sound for the name in this exercise. Then you go back to names later.


Get Started!

Pull out your alphabet set.  Show one of the letters of your child's name to her.  Ask, "What letter is this?"  If she tells you, hand her the letter. If she can not tell you, tell her the name of the letter and put it aside.  Pick another letter from her name and repeat the process until you have three letters that she does not know. If you finish her name, continue with other letters.

Once you have three she did not know, choose one and show it to her again.  Wait quietly for at least fifteen seconds.  If she says it, give it to her with a word of praise.  If she does not say it, return it to your pile and say nothing.  Repeat with the other two.

Make a note of which letters you are going to target. Offer to read her a book of her choice or spend some time playing together.


 The post, Getting Started with the Alphabet, by Christy McGuire originally appeared on WisdomKnowledgeJoy@blogspot.com.

At Home Pre-School Boot Camp: Week 3 Summary

Welcome to Week 3 of At Home Pre-school Boot Camp!  If you missed the beginning of the series, you may want to start from Week 1.  

Things to do just once this week


Make that formal group activity a priority.  It can be challenging, especially if you have multiple kids in tow, but it is important to your child's long term success!


After painting, this week's new art activity is a breeze.  Click here to learn about construction paper art. 

Pull your magnetic letters or alphabet book! Click here for a simple activity to get you started.

 Review options

 If your child is able to write his name, revisit the simple writing from week one, but on a different day.  If you have time, give painting another go.


Daily habits


Keep up the reading and play times you have already established!  Those two habits are crucial to the success of everything else.  

Enriching your home environment


Do you play music through out the day?  Music is good for your child mentally and emotionally.  Classical, jazz, folk, and your personal favorites should all have a place in your day.  Develop some play lists, buy an album of new music, or find a couple of go to stations on Pandora.  Plan to turn on the music while you do an art project or chores with your kids.

Looking ahead


Next week, it is time to cook!  Choose a recipe, and buy the ingredients. If you need a place to start, try my kid friendly recipe board on Pinterest.  If cooking with kids scares you, choose a recipe labeled "Mix and Measure" or "Simple Sensory".  I will have a post on the "Why and How of Cooking" next week.


Friends to Follow


Becky at This Reading Mama is a true professional.  She is also a mom who writes curriculum for her own kids and shares it.  My kids both love her various reading packs.  You will probably gravitate toward her awesome activities, but be sure to read her posts on language and reading development. I have relied heavily on her insight when working with my own children!

While you are exploring This Reading Mom, you will probably find  Anna, The Measured Mom.  Her reading packets are also popular at our house and have provided hours of appropriate leveled reading practice.  You will also find lots of great hints on working with mixed age levels on her site. Valuable advice for anyone multiple kids!


This post contains Amazon affiliate links.  Click here for more information.   Thanks for your support!  The post, At Home Pre-School Boot Camp: Week 3 Summary, by Christy McGuire originally appeared on WisdomKnowledgeJoy@blogspot.com.

Construction Paper Art


This post is part of my at Home Pre-School Boot Camp.  For more information about the series, click here.

Construction paper, glue, and maybe scissors.  Pre-school art can be that simple, and this project can be adjusted to match the fine motor level of each child in your home.  

Early Motor Skill Development


When my children were just starting to develop their fine motor skills I approached this project two ways.  One way was to just let them tear the paper, then glue it down.  The motions of tearing and gluing strengthen the fine motor muscles, and you might be surprised how much effort can go into creating a piece in this way.

Sometimes, it is more satisfying to actually make a picture though, especially if the card or picture is for someone else.  I would ask my child what he wanted to put in the picture, and quickly cut it out.  He would then glue it on the card.  Again, this strengthens muscles and improves coordination in those little hands.  Working together we made some fun things and wonderful memories.


Scissor Practice

Using scissors is an important skill in its own right, but it also strengthens the muscles needed for holding a pencil well.   Get a good pair of kids scissors that you would not mind using yourself.  Show your child how to hold them, then help him use them to cut the paper.  He may just want to cut, or you can let him glue the pieces together to make a special creation.

Writing Practice

Once he is comfortable holding a pencil, you can ask your child to draw or trace patterns on the paper, then cut them, and re-glue.  This allows your child to gain confidence in manipulating the pencil, without the added pressure of trying to form letters.  

Projects!


There are so many great projects to do with construction paper!  We used it a year ago to make some finger puppets, and before that we made some self portraits.  In fact, T-Rex just saw these pictures and asked to do it again!


 We love Discovering Great Artists by MaryAnn F.Kohl and Kim Solga, and their lesson on Henry Matisse calls for a technique similar to this.  If you keep the colored paper, scissors, and glue together in an easy to find box, you will be ready to go with any of these lessons or just to enjoy the afternoon together making some art!


This post contains Amazon affiliate links.  Click here for more information.   Thanks for your support!  The post, Construction Paper Art, by Christy McGuire originally appeared on WisdomKnowledgeJoy@blogspot.com.

Saturday, July 12, 2014

Amazing Whistling Eggs!


  Deviled eggs are great for potlucks, sliced eggs add protein to summer salads, and all that egg boiling provides an opportunity for some interesting observation.

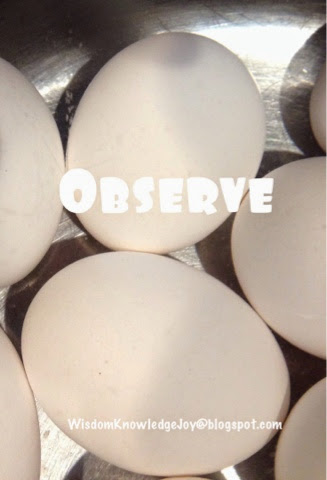
Boiling eggs are noisy!  Shrill whistling sounds accompanied the cooking process in this photo, and you can see why.


  Those little bubbles were escaping from all the eggs.  The Pony Artist was very interested in the little bubbles.  I told her that I thought they were made of air that was expanding inside of the egg.  She was fascinated to learn that there can be air inside of an egg.  I explained that the shell allows air to pass through it, providing oxygen to the chick inside.  At this point, she became very concerned that we were preparing to eat baby chicks.  I assured her that this was not the case.  Eggs containing chicks do not make their way to grocery stores, and are not generally eaten --at least not in our culture.

While we were on the subject of cooking eggs, I explained that it is important to turn up the temperature on the water slowly when cooking eggs.  Causing the expansion to happen to quickly will break the shell.  I also demonstrated that phenomena this week, but did not photograph the ugly results.

 Finding all three states of matter, , gas, and a solid composing a single object is fascinating to me.

Has anything fascinating appeared in your kitchen recently?


The purpose of this Science Along the Way series is to help me, my kids, and my readers appreciate the wonder of the natural world in our every day experience. If you have an experience that you would like to share, please e-mail me at WisdomKnowledgeJoy@gmail.com. 

The Post "Amazing Whistling Eggs!" first appeared on WisdomKnowledgeJoy@blogspot.com.

Saturday, July 5, 2014

Bottle Rocket Experiments

This activity addresses Next Generation Science Standard
5-PS1-4.Conduct an investigation to determine whether the mixing of two or more substances results in new substances.

When I first started with the Recycle! Create! group, I thought that I was challenging myself to develop activities for my children.  However, it has become very obvious that my older children, T-Rex in particular, are beyond that.  They still need guidance and supervision , but they can do their own projects.

So, if you will indulge some Mommy bragging, I would like to show you their bottle project.

T-Rex wanted to use vinegar and baking soda to launch a bottle.  Pony artist wanted to try it too, so they each carefully measured baking soda and vinegar and recorded the amounts in their journals.


prompted them to mix their ingredients at the last minute and we set up our rockets out doors.


We were not thrilled with the results, so we went in and journaled.  It was time for me to take care of Little Diddle, so they did not get to try again that day. 


 Our basic problem was too much baking soda.  I pointed this out, so the next time they had time to work, T-Rex adjusted the amount.  It was perfect!  It reacted quickly and explosively!  All over me, so no pictures.

The next step will be to figure out a mechanism that allows us to get things set up before the explosion.  We have done some work on it, but no success yet.  I will let you know if we figure it out. If you have an idea, we would be interested to hear it.


Do you have your own ways to use bottles?  Join the Link up!


Friday, July 4, 2014

Camouflage in the House


  Can you see what the Pony Artist found?  The little grasshopper blended quite nicely with the goo.  (Old weatherstripping, I think.  There is always one more project, eh?)


When we disturbed him, he was much more visible against the dark wood.  We eventually convinced our little friend to head outside.

 I always thought camouflage was kind of happenstance, but it seems like the grasshopper knew where he needed to be.  If you know how he knew where to be, we would love to learn more. Please tell us!


The purpose of this series is to help me, my kids, and my readers appreciate the wonder of the natural world in our every day experience. If you have an experience that you would like to share, please e-mail me at WisdomKnowledgeJoy@gmail.com.