Thursday, February 28, 2013

Balance Bikes


This month we're participating in Move and Groove with your Kids at Toddler Approved!  Click on the button in the side bar if you'd like to get in on the fun!


We first encountered balance bikes at a park in Kuwait.  An American boy sped up on this brilliant little contraption, and his mother explained that in California, every one was riding them.  The concept is so simple, it makes me wonder why no one has thought of this before.  Basically, these are small bikes without pedals.  Any child who is walking with confidence can "ride it" simply by straddling the bike and walking.  As the child gains confidence, he can start coasting for periods of time.  If he loses his balance, he simply catches himself with his feet.  Some people claim that kids will know how to ride a standard bike after riding one of these.  We haven't gotten that far, but even if the only benefit is in using it right now, we are getting our money's worth.

One reason we love these bikes is that they do not take up much space.  We keep them in our minivan, and are ready to ride bikes any time we find a path or side walk.  The second reason we love these bikes is that Mom and Dad get some exercise too.  My daughter, two at the time, was able to keep a pace equivalent to a fast walk for a mile or so when we first got the bikes.  Now, both kids can keep me running.  No more choosing between them getting exercise or me getting exercise while they ride in the stroller!  Everybody's heart rates are up.  Both of my kids love riding these. Just this afternoon my daughter and I spent thirty minutes circling the block at her request.

We bought these bikes off of Amazon.  We chose the Glider brand because we were able to get a sixteen inch bike for our tall four-year-old.  Friends have the Strider and like it as well.  Here's the link to the main Glider web-site if you'd like more information or to try to find them in a store.


I

Sunday, February 24, 2013

Thursday, February 21, 2013

Learning with Playdough

Play dough is an amazing substance.  My kids will play with play dough for hours.  

When we lived in Kuwait, making play dough was by far easier than trying to find it.  A good friend asked me to "try out" a recipe for a church group, and I am grateful for the nudge in the right direction.

Homemade play dough recipe


This recipe comes from CEF:  1 part corn starch, 2 parts baking soda, 1.5 parts water.  (i.e. 1 cup cornstarch, 2 cups baking soda, 1.5 cups water)

1.Mix everything in a sauce pan.
2. Cook and stir on medium low heat, until all at once it comes together and forms into a ball.
3. Cool.
4. Knead in a little extra cornstarch as you go.

I have to admit I was scared to try it, but it turned out brilliantly!  Of course, you can always buy the commercial version.

What do we do in those happy hours?


 Make stuff. 


I've noticed that my kids are interested in making stuff longer if I engage in a little parallel play making stuff too.  This took a little effort at first.  After a while, it became a relaxing opportunity to try something new.  The picture above is my attempt to mimic pottery done by the Cherokee.  Not the work of a master, but it was fun.


Use tools.


When I see that just making stuff is getting a little boring, I like to introduce stuff: the random piece of plastic my son is using above, butter knife, rolling pin, tooth picks, slotted spoon. Of course, sometimes my son starts pulling out tools as soon as we pull out the play dough.

Practice math skills.


My kids love asking me to make tiny balls, which could also be called spheres.  Sometimes we make cubes and build structures.  Sometimes I ask for a particular number of pieces of play dough.  My daughter can count to six pretty easily right now, so I ask for four first.  Then I ask for seven, then five and so on.


Write.


When we were learning the alphabet I made letters and asked for their names.  Then I asked for the sounds that they make.  Now I make simple words and coach my kids to sound them out.  You could do the same with numerals.


Of course, all this time we're strengthening the muscles needed for fine motor skills.  

Using just one activity I cover all my objectives for the day.  Even better, I connect with my children in a way we all enjoy.


Saturday, February 16, 2013

Holiday Cookies


We love making sugar cookies for any holiday, or in between holidays.  I use a recipe from the Mennonite Community Cookbook, edited by Mary Emma Showalter.   Few ingredients, no chilling, and perfect texture ever time make this one more treasure from my Mennonite friends.  

My kids love to do the measuring and mixing.  I place the flour and the measuring cup on an old (see it doesn't look good!) cookie sheet to conserve any spillage while my daughter spoons the flour into the measuring cup, Then we work together to level it with a knife, and count out the number of cups needed.  Perfect toddler math lesson and motor skill practice!


The reason I love this recipe is that as soon as the dough is mixed, it's ready to roll.  I clean a section of the table and use the spilled flour from the cookie sheet to flour it and the rolling pin.


This week we used different sized hearts.  She really wanted to use them all every time, so I explained that the best strategy was to work biggest to smallest.


After the cookies were baked and cooled I mixed a little milk with powdered sugar and added some sprinkles.  (Hint: Mix in just a little milk at a time, and your frosting won't be runny like mine.)


  This recipe was submitted by Mrs. Simon Gingerich.


Ingredients
1 1/2 cups butter
1 1/2 cups sugar
2 eggs
4 cups flour

I like to add 1 teaspoon of salt and 1 teaspoon of vanilla with the wet ingredients to give a little flavor.  


Pre-heat oven to 375 degrees F.  (190 C). Mix the wet ingredients well, then add the flour little by little. Roll out to about 1/8 inch (0.5 cm) thickness and cut with cookie cutters.  Bake until done, about 10 minutes.

Baking with kids is a great way for them to learn.  It's also a great way to stress myself out.  I always allow at least four times the time it would take me to accomplish the task by myself, and don't expect to multi-task.  I keep the ingredients on the counter, and give my kids exactly what I want them to have at that moment.  I expect them to entirely need to change clothes when we're done, and I banish them from the kitchen while I finish baking and clean up.  So far, they're always eager to join in when it's time to bake.


You might also like:
Add a little Biology to your Baking


Thursday, February 14, 2013

Two Books For Black History Month

February is Black History Month.  Here are two books we've enjoyed recently that would be great for a Black History theme.


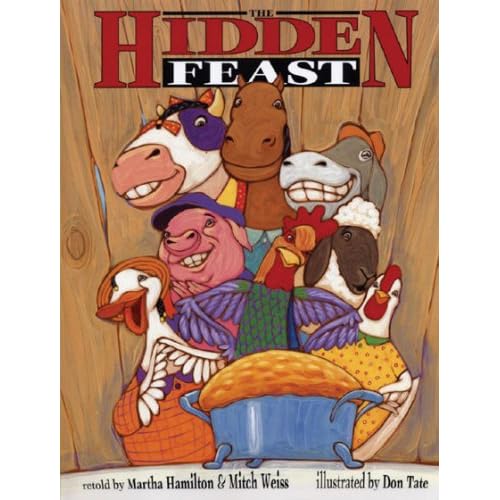
The Hidden Feast  is a traditional Black American folk tale about barnyard animals.  The morale of the tale is persistence, although it also teaches gratitude.


Head, Body, Legs  comes from Liberia.  Reminiscent of the Biblical parable about the eye needing ear, body parts meet up in an African forest and learn to work together.


Thursday, February 7, 2013

Science for Pre-school Artists

Here's a quick add-on to a painting activity that doubles as a science lesson.  On this particular day we happened to be painting with sparkly paint, which turned out to be a bonus, although I wouldn't say it was necessary.

Read more at Thriving STEM.